Signs Your Insulation Is Failing and What to Do in OK
TL;DR
Insulation does not last forever. Fiberglass settles under its own weight, absorbs moisture, and can lose up to 40% of its effectiveness after 15 to 20 years. Cellulose compacts and clumps when exposed to Oklahoma's humidity. Rodents tunnel through it and leave contamination that makes it a health hazard. The problem is that insulation failure is gradual and invisible. Your energy bills climb by $10 or $20 a month. One room gets a little warmer each summer. You adjust the thermostat and move on. By the time you notice the problem is serious, your insulation may have been underperforming for years. This blog shows you what failing insulation looks like, what it feels like from inside your home, and what to do about each sign before the damage compounds further.
Sign 1: You Can See the Tops of Your Attic Floor Joists
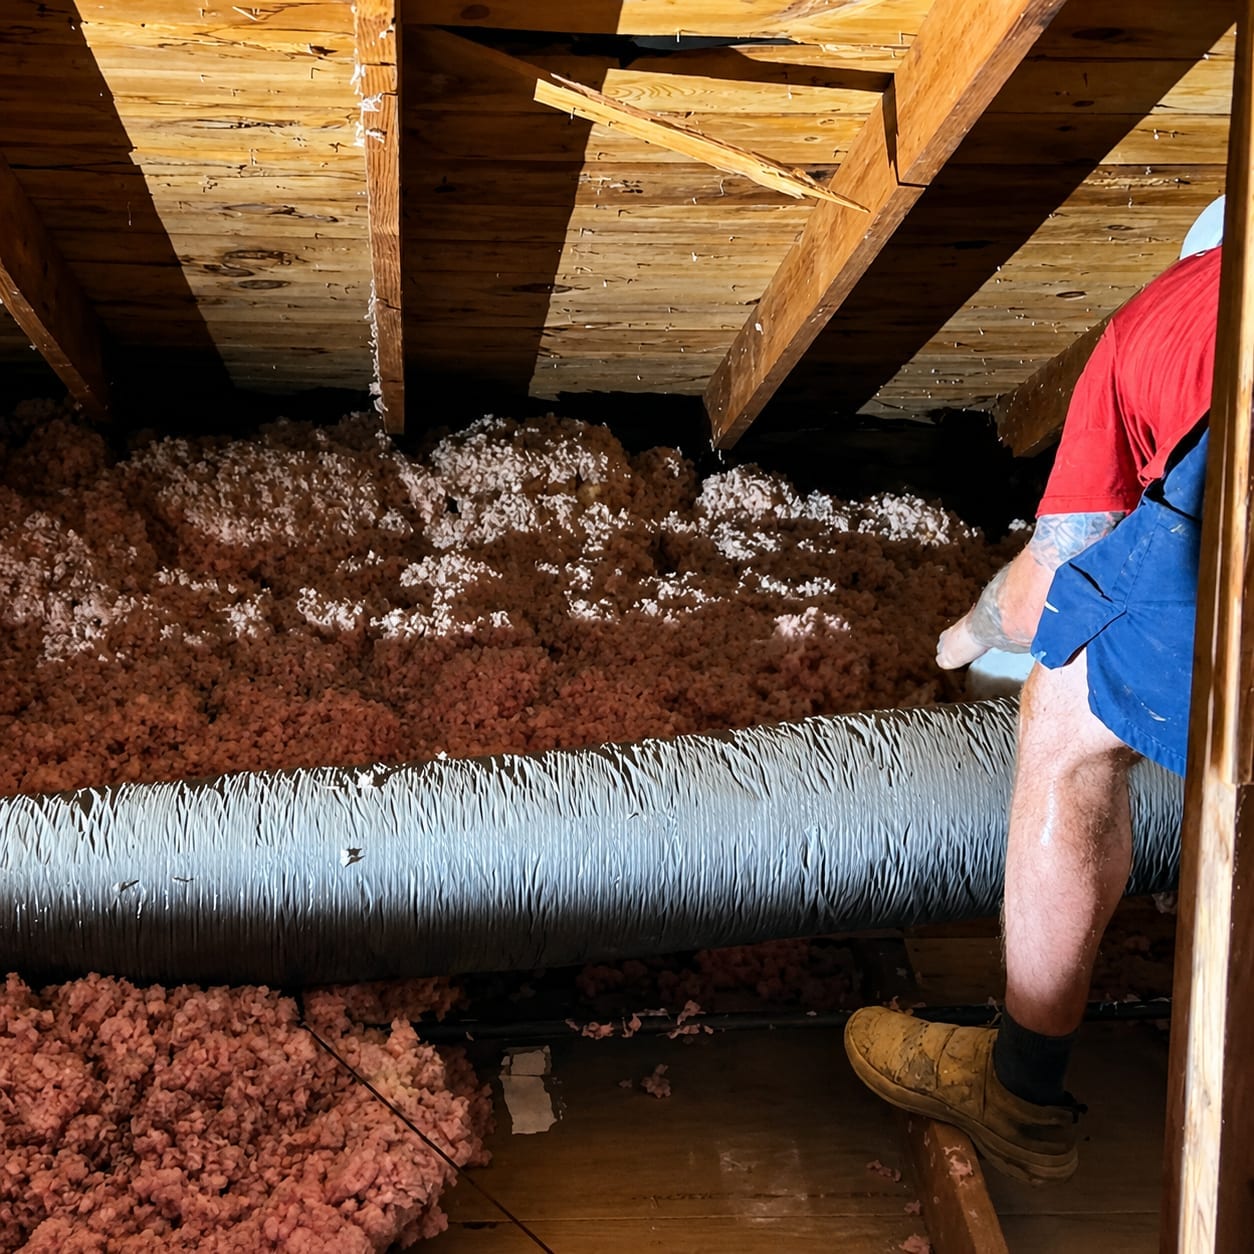
This is the simplest and most reliable visual check any homeowner can do. Go into your attic with a flashlight and look at the insulation depth relative to the floor joists.
In Oklahoma, the 2015 IECC energy code requires R-38 for attic insulation in most climate zones. For blown-in fiberglass, R-38 requires approximately 12 inches of depth. For cellulose, approximately 10 to 11 inches.
If you can see the tops of the joists above the insulation, the material has settled below its effective R-value. If the joists are fully exposed with insulation only partially filling the bays, the insulation is performing at a fraction of what it was designed to deliver.
Blown-in fiberglass and cellulose both settle over time. Research indicates that typical settlement is 1 to 2 inches over 20 years for loose-fill fiberglass under normal conditions. Greater settlement suggests installation issues, moisture exposure, or physical disturbance from attic traffic, storage, or HVAC service work.
If you are due for a depth check, measure at five or more spots across the attic, focusing on corners, eaves, and areas near the attic hatch where insulation is most commonly disturbed.
Sign 2: Your Energy Bills Keep Climbing Without Explanation
A gradual, steady increase in heating and cooling costs, independent of rate changes, is one of the earliest indicators of insulation degradation. The problem is that it happens so slowly most homeowners attribute it to rate increases or weather rather than their building envelope.
Energy Star data indicates that homes with adequate insulation and air sealing maintain consistent energy usage within 10 to 15% variation year to year when accounting for weather differences. If your bills are trending upward beyond that range without a change in occupancy, equipment, or rates, insulation degradation is one of the most likely causes.
Pull your utility bills for the past three years and compare the same months. Look specifically at kWh usage (not just dollar amounts, since rates change). If your July kWh is 15 to 25% higher this year than it was three years ago with the same thermostat setting, your building envelope is letting more heat in and more conditioned air out than it used to.
Sign 3: Rooms That Will Not Stay Comfortable
If you have rooms that are consistently warmer in summer and cooler in winter than the rest of the house, and adjusting the thermostat does not fix it, the insulation in the walls or ceiling serving those rooms is likely compromised.
Common problem rooms include bedrooms over the garage (which our garage insulation blog covers in detail), rooms on the sun-facing side of the house, rooms directly below the attic, and end-unit rooms with more exterior wall area relative to interior volume.
Healthy insulation creates a consistent thermal barrier. When that barrier has gaps, thin spots, or degraded material, heat moves through those weak points faster than through the properly insulated areas. Your HVAC system cools or heats the whole house to the thermostat setting, but the compromised rooms drift away from that setting faster because they cannot hold the temperature.
A blower door test combined with a thermal camera walkthrough identifies exactly where heat is entering or escaping, often revealing problems that are completely invisible to the naked eye.
Sign 4: Drafts Near Walls, Outlets, and Baseboards
If you feel moving air near electrical outlets, light switches, baseboards, or along exterior walls when those surfaces should be still, air is flowing through gaps in the wall cavity that insulation should be blocking.
As insulation settles or degrades inside wall cavities, it creates voids at the top of the stud bay. Outdoor air enters through cracks in the sheathing, travels through the empty portion of the cavity, and exits through gaps around outlet boxes and trim. You feel it as a draft even with all windows and doors closed.
This is not a window or door problem. It is a wall insulation and air sealing problem. Spray foam in the wall cavity fills the entire space and seals around penetrations, eliminating both the void and the air pathway. For a full explanation of how air sealing addresses infiltration, see our guide: Spray Foam and Indoor Air Quality.
Sign 5: Discolored Insulation
Insulation should be roughly the color it was when installed. Pink or yellow fiberglass should still be pink or yellow. White blown-in should still be white. If your attic insulation has turned gray, dark brown, or black, it has been filtering air for years.
Dark discoloration indicates that air has been moving through the insulation continuously, carrying dust, particulate, and soil gases that deposit on the fibers over time. The discoloration is concentrated at bypass locations: around recessed lights, along top plates where interior walls meet the ceiling, around plumbing chases, and at the attic hatch.
This discoloration is a visual map of your home's air leaks. Every dark spot is a penetration where conditioned air has been escaping into the attic (in winter) or hot attic air has been entering the living space (in summer). The insulation in those areas has also lost significant R-value because the air movement through it reduces its thermal resistance.
Sign 6: Moisture, Staining, or Mold
Insulation that has gotten wet is insulation that has failed. Research from the Lawrence Berkeley National Laboratory found that just 1.5% moisture content can reduce fiberglass insulation effectiveness by up to 35%. Once fiberglass gets wet, the fibers compress, the material loses loft, and even after drying it may not return to its original R-value.
In Oklahoma's humid climate, attic insulation can absorb moisture from several sources: roof leaks (obvious once you see staining), condensation from unvented bathroom or dryer exhaust ducted into the attic rather than outdoors, humid air infiltrating through unsealed attic penetrations and condensing on cold surfaces during spring and fall temperature swings, and HVAC condensate pan overflows that drip onto insulation below the air handler.
The EPA states that any insulation that has become moldy should be removed and replaced. Mold spores penetrate deep into fiberglass and cellulose fibers and cannot be effectively cleaned. If you see black, green, or white patches on your insulation or on the wood framing around it, the affected material needs to come out.
For homes with extensive contamination, a full attic restoration (removal, sanitization, air sealing, and re-insulation) is the comprehensive solution.
Sign 7: Evidence of Pests
Rodents love insulation. It is warm, soft, and hidden. Mice, rats, and squirrels tunnel through fiberglass and cellulose, creating nesting cavities and air channels that destroy the material's thermal performance. Their droppings and urine contaminate the insulation with pathogens including hantavirus, which carries a 38% mortality rate.
Signs of pest activity in your insulation include visible droppings (small dark pellets scattered on or in the insulation), tunnels or compressed pathways through loose-fill material, nesting material (shredded paper, fabric, or insulation fibers gathered into clumps), a persistent ammonia or animal odor in the attic or from ceiling vents, and sounds of scratching or movement in walls or above the ceiling at night.
If pest contamination is present, adding new insulation on top is not the solution. The contamination remains underneath, continues to affect indoor air quality, and provides an ongoing food source and habitat for additional pest activity. Full removal, sanitization, pest exclusion, and re-insulation is the correct path.
Sign 8: Your Insulation Is 15 or More Years Old and Has Never Been Inspected
If your home was built before 2010 and the attic insulation has never been inspected or supplemented, there is a strong probability that it is underperforming. Building codes have changed significantly. Insulation that met code in 2000 may fall well below current R-38 requirements. Materials that were adequate when installed have had 15 to 25 years of settling, moisture cycling, and potential pest activity.
An annual visual inspection of your attic insulation takes 10 minutes and can catch problems before they become expensive. Check depth, color, coverage uniformity, and look for any signs of moisture, mold, or pest activity. If anything looks wrong, a professional assessment with a blower door test and thermal imaging gives you the full picture.
What to Do When You Find a Problem
The right fix depends on what you find:
Settled but clean and dry: Adding more blown-in insulation on top can restore the depth and R-value. Air sealing the attic floor penetrations before adding insulation maximizes the improvement.
Wet, moldy, or pest-contaminated: Full removal, sanitization, air sealing, and re-insulation. Do not add new material on top of compromised insulation.
Drafts and air leaks without visible insulation damage: Air sealing at the penetration points (spray foam at top plates, recessed lights, plumbing chases, and rim joists) addresses the air movement problem even if the existing insulation stays in place.
Chronic comfort problems that insulation alone has not solved: A blower door test and thermal imaging assessment identifies whether the problem is insulation, air leakage, duct leakage, or a combination. Data-driven diagnosis prevents spending money on the wrong fix.
Ready to Find Out If Your Insulation Is Still Working?
At Rocking Rad Spray Foam LLC, we inspect attics, crawl spaces, and building envelopes across Oklahoma to identify insulation that has failed and recommend the right fix for your specific situation. We offer blower door testing, thermal imaging, attic restoration, air sealing, and spray foam insulation. Free on-site estimates and 0% financing available. Contact us or fill out our online form to schedule yours.
Frequently Asked Questions
How often should I inspect my attic insulation?
Once a year is a good practice. A quick visual check of insulation depth, color, and coverage takes 10 minutes and can catch settling, moisture, or pest problems early. The best time in Oklahoma is late fall after summer heat has passed and before winter heating season begins.
Can I just add more insulation on top of the old stuff?
Only if the existing insulation is clean, dry, and free of pest contamination. Adding new material over wet, moldy, or contaminated insulation traps the problem underneath. If the old insulation is in good condition but has simply settled, adding more blown-in on top to restore depth is a cost-effective solution, especially if you air seal the attic floor penetrations first.
How do I know if my insulation problem is an air sealing problem instead?
If your insulation looks adequate in depth and condition but you still have comfort issues and high bills, the problem may be air leakage rather than insulation R-value. A blower door test quantifies total air leakage, and a thermal camera walkthrough during the test reveals where specific leaks are. Many Oklahoma homes have adequate insulation depth but poor air sealing, which means the insulation is present but underperforming because air bypasses it.
Does spray foam degrade the way fiberglass and cellulose do?
Closed-cell and open-cell spray foam do not settle, compress, or absorb moisture under normal conditions. The DOE notes that open-cell polyurethane foam has an R-value that does not change over time. Spray foam can be damaged by physical impact, flooding, or fire, but it does not experience the gradual degradation that fiberglass and cellulose undergo from settling, moisture cycling, and pest activity.
What does a professional insulation assessment cost?
A blower door test with thermal imaging typically costs $200 to $400 for an existing home. Some contractors include the assessment as part of a project scope at no additional charge. The data from the assessment pays for itself by identifying exactly where your money should go for the largest improvement, rather than guessing.
Are there financial assistance programs for insulation upgrades in Oklahoma?
There is currently no federal tax credit for residential insulation. The Oklahoma Department of Commerce Weatherization Assistance Program provides no-cost energy efficiency improvements to qualifying households. Some Oklahoma utilities offer rebates for insulation and air sealing work. Check with your provider for current options.