Spray Foam Installation Mistakes and How to Spot Them in OK
TL;DR
Spray foam insulation is one of the highest-performing insulation products available, but its performance depends almost entirely on the quality of the installation. The same foam applied by an experienced, properly equipped crew produces a fundamentally different result than the same foam applied incorrectly. According to building science analysis, roughly 40% of spray foam failures stem from human error during application. Off-ratio chemical mixing, insufficient thickness, wet substrates, lifts sprayed too thick, and wrong foam type for the application are the most common mistakes. Knowing what they look like helps you evaluate any spray foam installation, whether you are inspecting a contractor's work on your home or assessing insulation in a building you are buying.
Why Installation Quality Matters More Than Product Choice
Every spray foam manufacturer produces a good product. The chemicals, when mixed at the correct ratio under the right conditions, produce consistent, high-performance insulation. The variable is not the foam. It is the person holding the gun.
A detailed analysis in JLC Online explains that good foam requires the correct combination of heat, pressure, and spray gun configuration. Getting just one of these factors wrong can result in poor cell structure and dimensional instability, leading to problems like shrinking, cracking, voids, and poor adhesion.
This is why the SPFA Professional Certification Program exists. It trains and tests applicators on mixing ratios, temperature management, lift thickness, substrate preparation, and safety protocols. Hiring a certified installer does not guarantee perfection, but it significantly reduces the risk of the mistakes covered below.
Mistake 1: Off-Ratio Chemical Mixing
Spray foam is created by mixing two liquid chemical components (the A-side and B-side) at a precise 1:1 ratio by volume. When that ratio is off by more than about 2%, the foam does not cure properly and the result is visible and measurable.
A-rich foam (too much isocyanate) tends to be hard, brittle, and friable. It may crack when you press on it and can have a dark or amber discoloration rather than the normal cream or off-white color. It is structurally unsound and does not deliver its rated R-value.
B-rich foam (too much polyol resin) tends to be soft, spongy, and gummy. It may feel like wet bread when you press on it and may never fully cure. B-rich foam is also the most common cause of persistent chemical odors after installation, because the unreacted isocyanate off-gasses into the living space.
How to spot it: Properly cured closed-cell foam is rigid, cream-colored, and does not deform easily when you press a thumb into it. Properly cured open-cell foam is soft but springy, like a firm sponge, and bounces back when pressed. If the foam is discolored (dark amber, yellow-brown, or streaky), excessively hard and crumbly, or soft and sticky, the ratio may be off. Persistent chemical odors more than 24 to 48 hours after installation are a strong indicator of off-ratio foam and should be addressed immediately with your contractor.
Off-ratio foam typically occurs because of improperly stored chemicals (stored outside the manufacturer's recommended 60 to 80°F temperature range), contaminated or expired components, or equipment that is not properly calibrated before spraying. A good contractor checks chemical temperature, equipment pressure, and spray pattern before beginning every job.
Mistake 2: Lifts Sprayed Too Thick
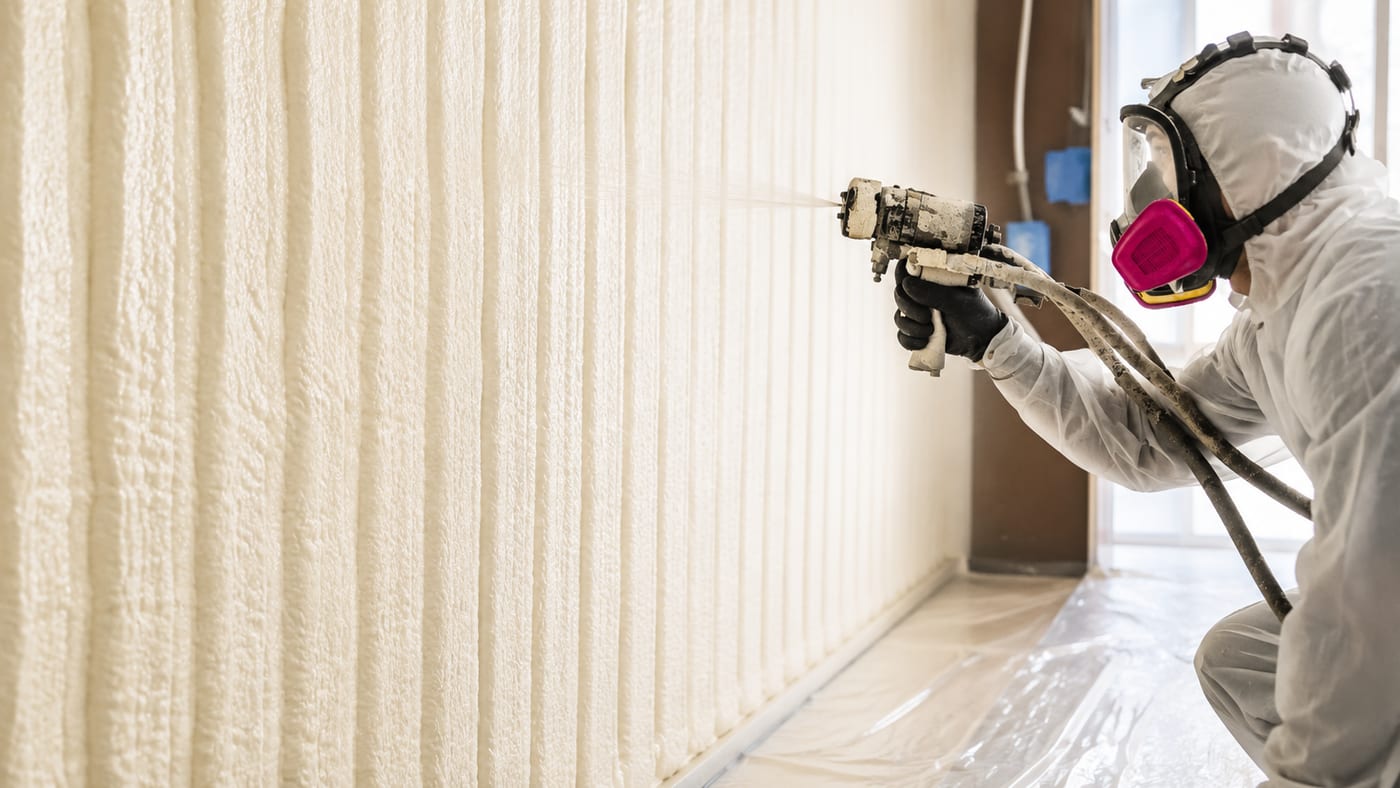
Spray foam is applied in thin passes called "lifts." Each lift should be no more than approximately 2 inches thick for closed-cell foam. The foam generates heat as it cures (an exothermic reaction), and if a single lift is too thick, the heat cannot dissipate fast enough. The result is internal temperatures that exceed the foam's tolerance, causing cracking, shrinkage, charring, or in extreme cases, scorching that produces visible smoke and odor.
How to spot it: Look for cracks running through the foam surface, especially deep fissures that extend into the foam rather than just surface texture. Look for areas where the foam has pulled away from itself (internal shrinkage cracks). In severe cases, you may see darkened or discolored streaks inside the foam where heat buildup was excessive. Properly applied foam in multiple lifts has a uniform color and density throughout its thickness.
The correct technique is to apply 1 to 2 inches per lift, wait for the foam to cure and cool (typically 15 to 30 minutes between lifts), then apply the next layer. Rushing this process to save time on large projects is one of the most common shortcuts inexperienced crews take.
Mistake 3: Poor Substrate Preparation
Spray foam must bond to a clean, dry surface. When the substrate (wood framing, metal panels, concrete, or sheathing) is wet, dusty, oily, or below the dew point temperature, the foam does not adhere properly.
Industry guidance states that wood must be below 17 to 19% moisture content for spray foam to bond reliably. If the surface is below the dew point, moisture condenses on it and blocks adhesion. Dust, dirt, oil, and construction residue all prevent proper bonding. A useful rule: if you would not paint on the surface, you should not spray foam on it either.
How to spot it: Foam that has pulled away from the substrate (delamination) is the clearest sign. You may see gaps between the foam and the wood or metal it was supposed to bond to. In some cases, the foam appears intact from the surface but is not actually adhered behind it. A simple check: try to peel a small section at the edge. Properly bonded foam is difficult to remove and tears apart rather than peeling cleanly off the surface. Foam that lifts away cleanly in sheets has an adhesion failure.
Ideal substrate temperature during application is 40 to 90°F. Cold surfaces reduce both bonding strength and foam expansion. Hot surfaces cause rapid, uncontrolled curing. A professional crew checks substrate temperature and moisture before spraying and will reschedule if conditions are not right.
Mistake 4: Insufficient Thickness
Spray foam is specified at a particular thickness to achieve a target R-value and, for closed-cell foam, to reach the vapor permeance threshold (below 1 perm at 2 inches). When the applicator does not apply enough material, the insulation underperforms even if everything else was done correctly.
How to spot it: Thickness should be verified with a depth gauge or probe at multiple points across the installation. Properly installed foam has a consistent depth across the entire surface. Common thin spots include corners where the gun could not reach easily, areas around wiring and plumbing where the applicator rushed, edges near windows and doors, and transitions between wall and ceiling assemblies.
If your project spec calls for 2 inches of closed-cell foam, every area should measure 2 inches or more. A contractor who does not verify thickness with a gauge after spraying is not verifying the work. Ask to see depth checks at your walkthrough.
Mistake 5: Wrong Foam Type for the Application
Open-cell and closed-cell spray foam are different products with different properties. Using the wrong one in the wrong location creates problems that may not be obvious immediately but will show up over time.
Open-cell foam in a moisture-prone location (crawl space walls, metal building exterior surfaces, below-grade walls) allows moisture vapor to pass through the foam and reach the cold surface behind it. Over time, condensation forms behind the foam where you cannot see it, leading to rust on metal, rot on wood, and mold growth. Open-cell foam should not be used on any surface where moisture control is a primary concern.
Closed-cell foam where open-cell would suffice is not a failure, but it is an unnecessary expense. Using closed-cell on interior partition walls for sound control, for example, costs roughly twice as much per board foot as open-cell and does not provide better acoustic performance. A good contractor recommends the right foam type by location, not the most expensive option for every surface.
Mistake 6: Missing or Inadequate Fire Barriers
Building codes require spray foam to be separated from occupied spaces by a thermal barrier or ignition barrier depending on the location. In most homes, drywall serves as this barrier. In attics, crawl spaces, garages, and metal buildings where foam remains exposed, an intumescent coating or other approved barrier is required.
How to spot it: If you can see bare spray foam on a wall or ceiling in an occupied space with no drywall or coating over it, the installation may not meet code. Exposed foam in an attic accessed only for utilities typically requires an ignition barrier. Exposed foam on a garage ceiling with a bedroom above requires fire-rated drywall. If your contractor did not discuss fire barrier requirements before the job, ask specifically what was done to meet code and request documentation.
Mistake 7: Skipping the Post-Installation Verification
A professional installation does not end when the gun stops spraying. The final step is verifying that the work achieved what it was supposed to achieve: consistent thickness, proper adhesion, correct foam type in each location, and measurable air sealing performance.
What a good contractor does after spraying: walks the job with you or the builder to inspect coverage, checks foam thickness with a depth gauge at multiple points, trims excess foam at stud faces if drywall will be applied, identifies any areas that need touch-up, and offers or recommends a blower door test to verify the air sealing improvement.
What a bad contractor does: packs up and leaves without a walkthrough. If your contractor is not willing to inspect the work with you before calling the job complete, treat that as a significant red flag.
How to Protect Yourself Before Hiring
The best way to avoid installation mistakes is to hire a contractor who is less likely to make them. Before signing a contract, verify SPFA certification for the applicator who will actually be spraying your project. Ask for references from similar projects (attic, crawl space, metal building, or new construction depending on your scope). Confirm that the contractor carries liability insurance and workers' compensation. Request the product technical data sheet for the specific foam system they will use. Ask whether they verify thickness with gauges after application. Ask whether they offer blower door testing before and after the project.
A contractor who is transparent about their process, their certifications, and their quality control is the one most likely to deliver work you will never need to question.
Ready to Get Spray Foam Installed the Right Way?
At Rocking Rad Spray Foam LLC, we verify chemical temperatures, equipment calibration, and substrate conditions before every job. We walk every project with the building owner after application to inspect coverage and thickness. We offer blower door testing to document air sealing performance before and after. We provide free on-site estimates and 0% financing across Oklahoma. Contact us or fill out our online form to schedule yours.
Frequently Asked Questions
How do I know if my existing spray foam was installed correctly?
Look for consistent color (cream or off-white for most products), uniform texture, firm adhesion to the substrate, and no persistent chemical odors. If you see discoloration, cracking, foam pulling away from surfaces, or smell chemicals more than 48 hours after installation, contact your contractor for an inspection. A thermal imaging scan can reveal hidden thin spots or voids that are not visible on the surface.
Can bad spray foam be fixed without tearing it all out?
In many cases, yes. JLC Online's troubleshooting guide notes that unless the entire application is off-ratio, most repairs require removal of only 5 to 15 percent of the existing foam. Thin spots can be re-sprayed. Small adhesion failures can be cut out and reapplied. Widespread off-ratio foam or persistent odors typically require full removal and reinstallation, which is more expensive.
What does off-ratio spray foam smell like?
Off-ratio foam, particularly B-rich foam, produces a persistent chemical smell that has been described as fishy, sweet, or acrid. It does not dissipate after the normal 24 to 48 hour curing window. If you smell a strong chemical odor in your home days after the installation and ventilation does not resolve it, contact your contractor and do not occupy the space until the issue is evaluated.
Should I be present during the spray foam installation?
You should not be in the work area during spraying (EPA requires evacuation of non-crew members during application). However, you should be available for the post-installation walkthrough to inspect coverage, ask questions, and verify that the work matches the scope you agreed to. A reputable contractor will invite you to walk the job before calling it complete.
How can I verify the foam thickness after installation?
Ask your contractor to check depth with a probe or gauge at multiple points and show you the readings. If you want to verify independently, a simple wire probe (like a straightened paperclip) pushed into the foam at a perpendicular angle and measured against a ruler gives you an approximate thickness reading. Check at least five to ten points across the installation, focusing on corners, edges, and areas around penetrations where thin spots are most likely.